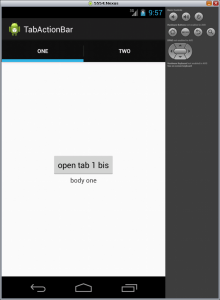
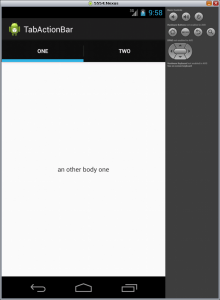
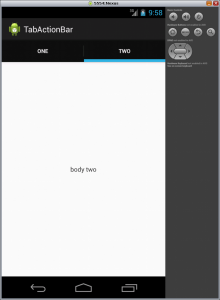
In the post Tab Layout in Android with ActionBar and Fragment I wrote an example about tabs in an action bar where each label open a fragment that you can not change at runtime.
In this post I explain how to replace a fragment with an other using a button.
- follow every step of the post Tab Layout in Android with ActionBar and Fragment
- add the following rows to the file values/strings.xml
<string name="body1b">an other body one</string> <string name="button">open tab 1 bis</string> <string name="tag_bis">bis</string> - insert a button in the linear layout in the file res/layout/tab1.xml
<Button android:id="@+id/button1" android:layout_width="wrap_content" android:layout_height="wrap_content" android:text="@string/button" /> - create the file layout/tab1b.xml
<?xml version="1.0" encoding="utf-8"?> <LinearLayout xmlns:android="http://schemas.android.com/apk/res/android" android:id="@+id/tab1b" android:layout_width="match_parent" android:layout_height="match_parent" android:orientation="vertical" android:gravity="center"> <TextView android:id="@+id/textView1b" android:layout_width="wrap_content" android:layout_height="wrap_content" android:layout_gravity="center" android:text="@string/body1b" /> </LinearLayout> - edit the file eu/lucazanini/Tab1Fragment.java
package eu.lucazanini;

import android.app.Fragment;
import android.app.FragmentTransaction;
import android.os.Bundle;
import android.view.LayoutInflater;
import android.view.View;
import android.view.View.OnClickListener;
import android.view.ViewGroup;
import android.widget.Button;
import android.widget.LinearLayout;

public class Tab1Fragment extends Fragment {

    @Override
    public View onCreateView(LayoutInflater inflater, ViewGroup container,
	    Bundle savedInstanceState) {

	LinearLayout ll = (LinearLayout) inflater.inflate(R.layout.tab1,
		container, false);

	Button button = (Button) ll.findViewById(R.id.button1);
	button.setOnClickListener(new OnClickListener() {

	    @Override
	    public void onClick(View v) {
		Fragment fragment = new Tab1bFragment();
		FragmentTransaction ft = getFragmentManager()
			.beginTransaction();
		ft.add(android.R.id.content, fragment, getResources()
			.getString(R.string.tag_bis));
		ft.hide(getFragmentManager().findFragmentByTag(
			getResources().getString(R.string.label1)));
		ft.commit();
	    }
	});
	return ll;
    }
}
the button adds the fragment with the tag “bis” and layout tab1b.xml and hides the fragment with tag “one” and layout tab1.xml
- create the file eu/lucazanini/Tab1bFragment.java
package eu.lucazanini; import android.app.Fragment; import android.os.Bundle; import android.view.LayoutInflater; import android.view.View; import android.view.ViewGroup; import android.widget.LinearLayout; public class Tab1bFragment extends Fragment { @Override public View onCreateView(LayoutInflater inflater, ViewGroup container, Bundle savedInstanceState) { return (LinearLayout) inflater .inflate(R.layout.tab1b, container, false); } } - replace the following methods of thew inner class TabListener in the file eu/lucazanini/TabActionBarActivity.java
- onTabSelected
public void onTabSelected(Tab tab, FragmentTransaction ft) { // Check if the fragment is already initialized if (mFragment == null) { // If not, instantiate and add it to the activity mFragment = Fragment.instantiate(mActivity, mClass.getName()); ft.add(android.R.id.content, mFragment, mTag); } else { // If it exists, simply attach it in order to show it ft.attach(mFragment); } // if a fragment with tag "bis" exists, detach it and show the // fragment of the selected tab Fragment f = getFragmentManager().findFragmentByTag( getResources().getString(R.string.tag_bis)); if (f != null) { ft.detach(f); ft.show(mFragment); } } - onTabReselected
	public void onTabReselected(Tab tab, FragmentTransaction ft) {
	    // User selected the already selected tab.
	    Fragment f = getFragmentManager().findFragmentByTag(
		    getResources().getString(R.string.tag_bis));
	    if (f != null) {
		ft.detach(f);
		ft.show(mFragment);
	    }
	}
if you select or reselect a tab and if the fragment with tag “bis” exists then this fragment is removed and it is shown that with tag “one”
- onTabSelected
- launch the app


Leave a Reply